 Manage Maintenance Work
SA Housing Trust manages maintenance in line with the Maintenance policy.

 CAUTION - If the Works Order has a status of or CLO - Closed please refer to Manage Warranty on Maintenance Work.
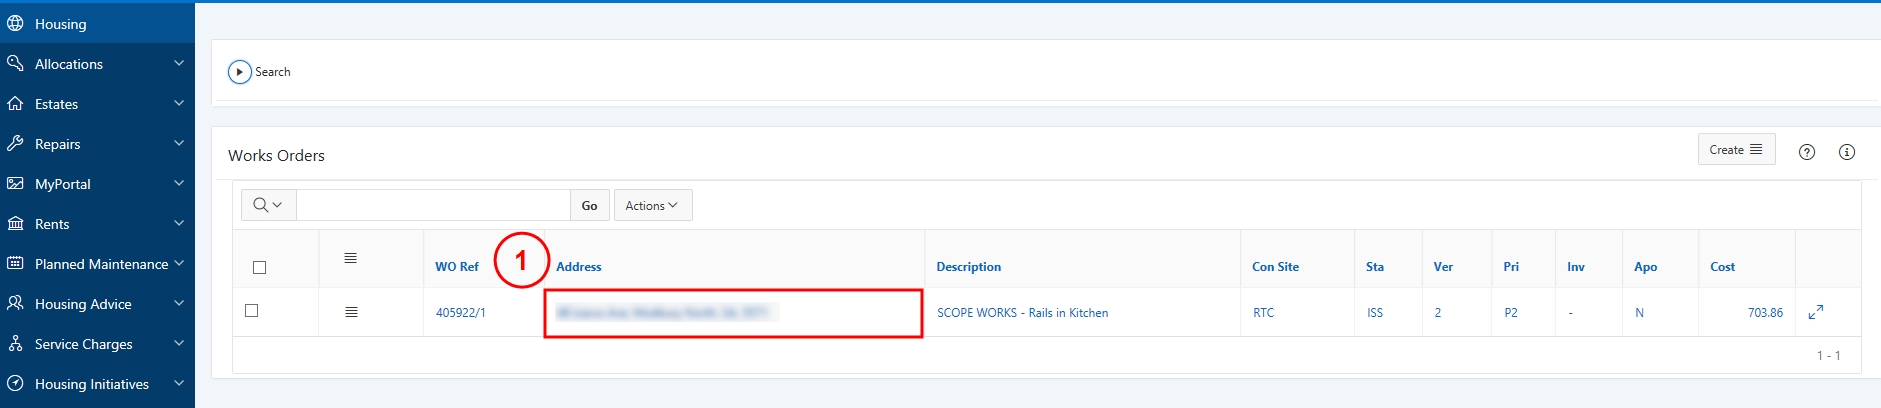
Search for the relevant Work Order ( Search and View a Works Order).
On the Works Order screen, select the relevant Works Order.
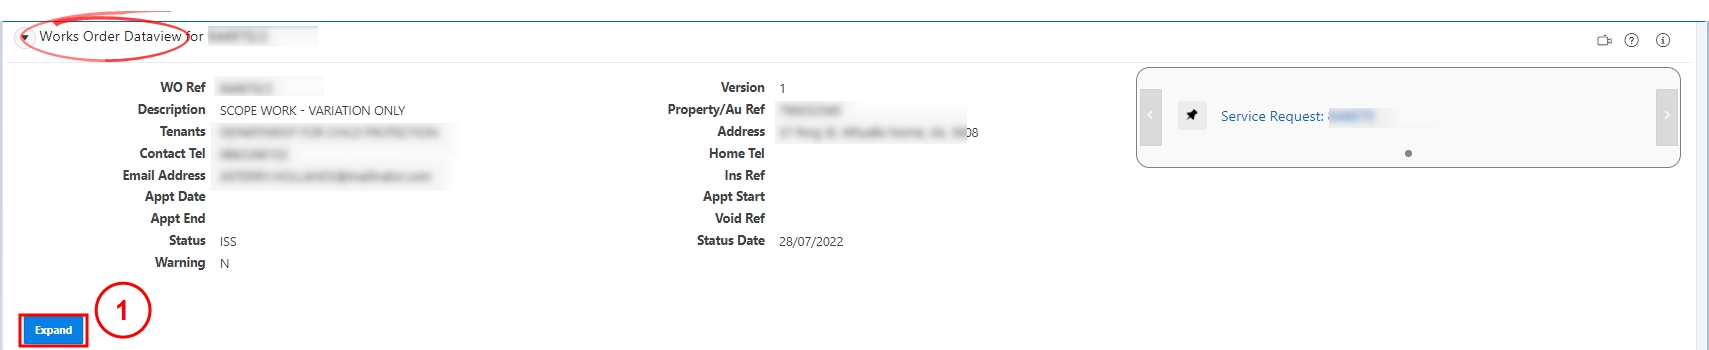
On the Works Order Dataview screen, select Expand to view the Expand region.
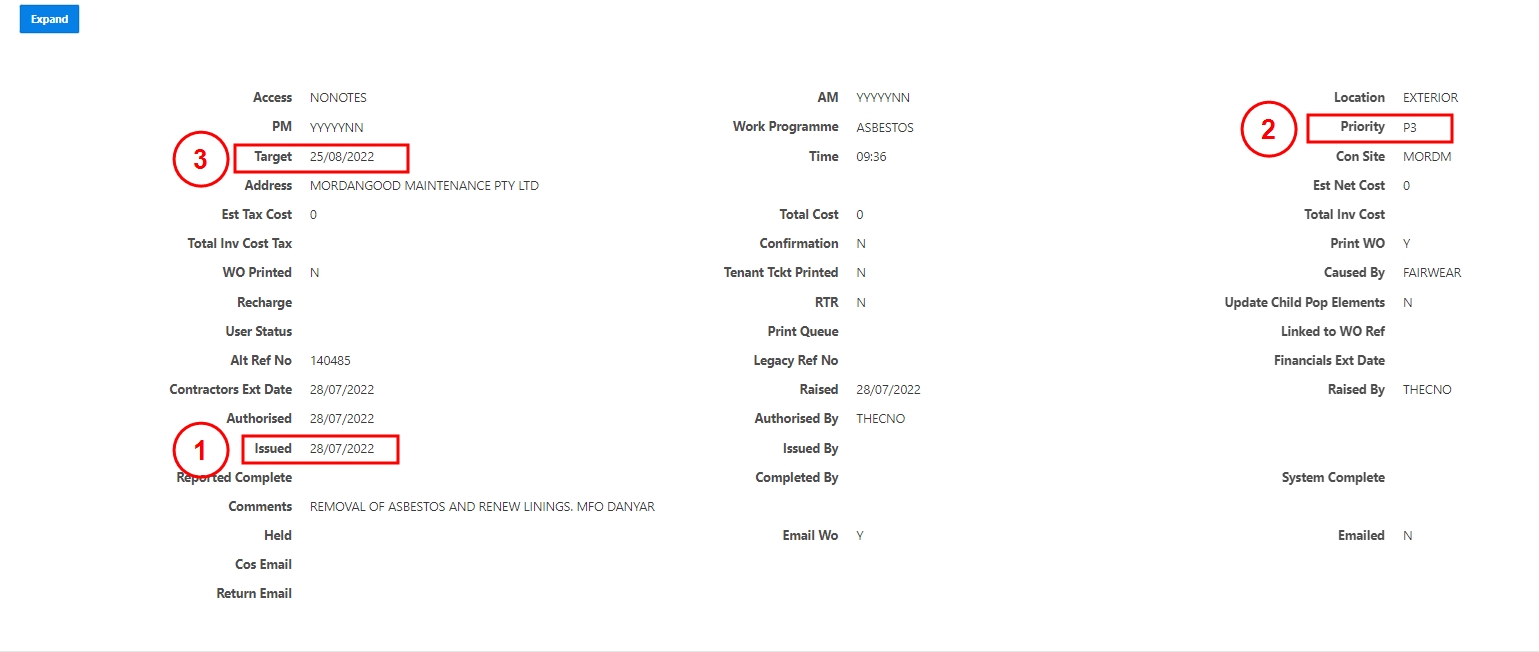
In the Expand region, note the Issued date as the date the contractor received the works order. Note the Priority, and the Target date as the date the work is due for completion. Assess whether the works order is still within the time frame for completion or is overdue and advise the tenant accordingly.
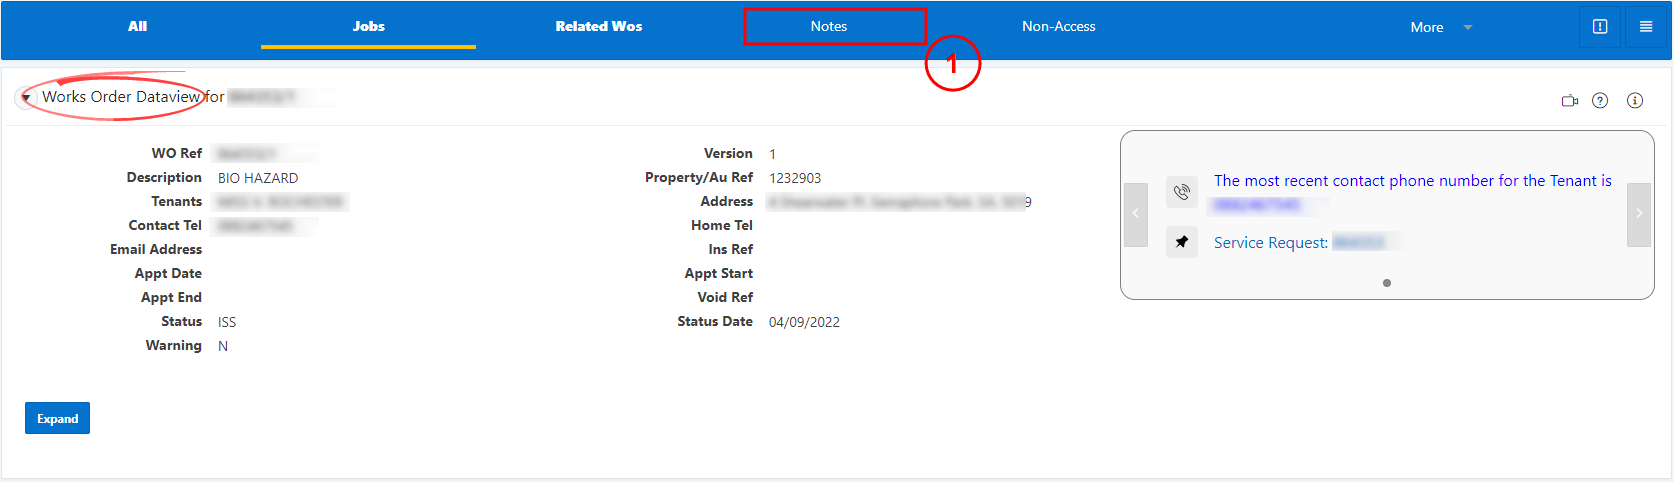
Select Notes from the top navigation links.
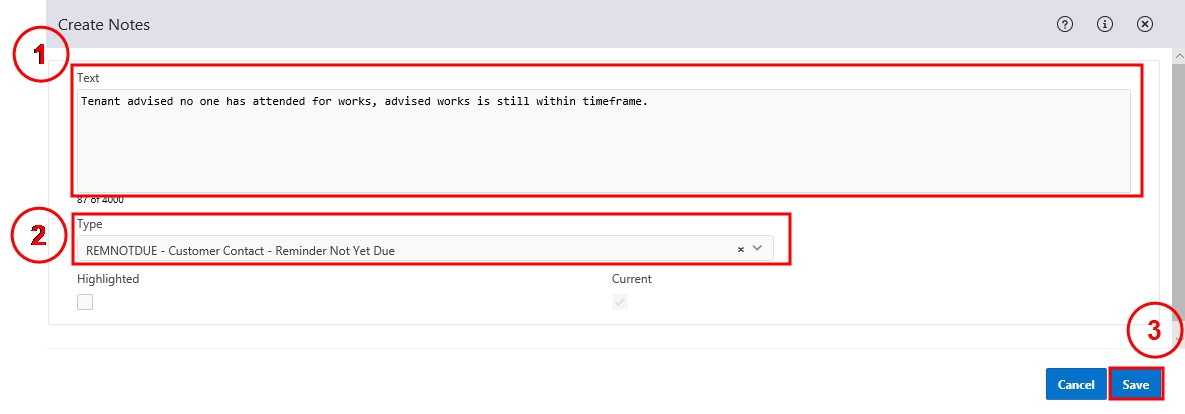
In the Notes region, select Create and Create Notepad Entry.

Enter a brief summary of the contact in the Text box. Select the Type field by from the drop-down. Select either:
- RCOMMENCE - Reminder to Contractor to send a reminder to the contractor if the target date has passed
- RMNOTDUE - Customer Contact - Reminder Not Yet Due if the work is still within the time frame for completion and no reminder needs to be sent.
Then select Save.
The note has been sent to the contractor.
The note will display in the Notes region.

No further action required.
CAUTION - If the works order is complete but not closed, create a note on the works order to advise there may be a warranty issue. Refer to  Responsive Maintenance - Add other related information to a works order.
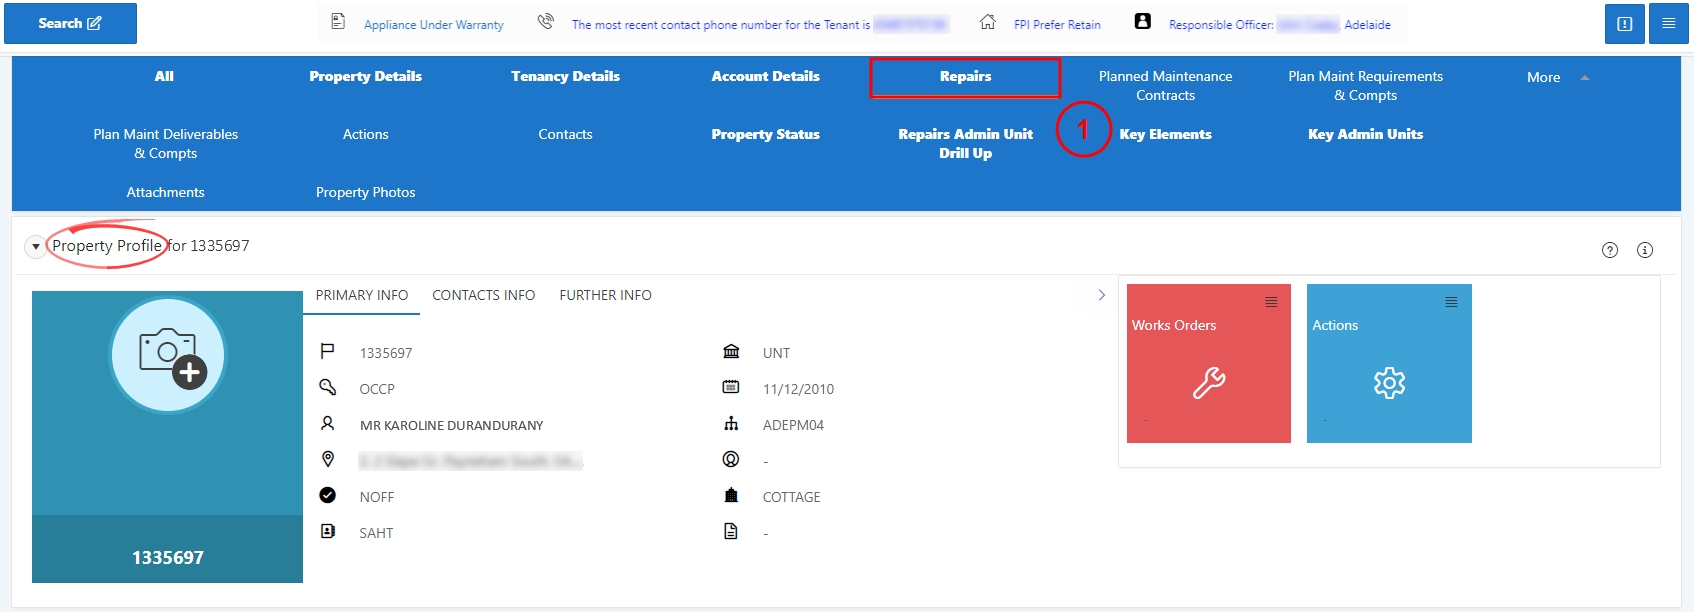
Search and view the property details ( Search and View Property or Complex Details).
On the Property Profile screen, select Repairs from the top navigation links.
From the Repairs region, select the Row Action Icon for the relevant Service Request and select View Service Request.
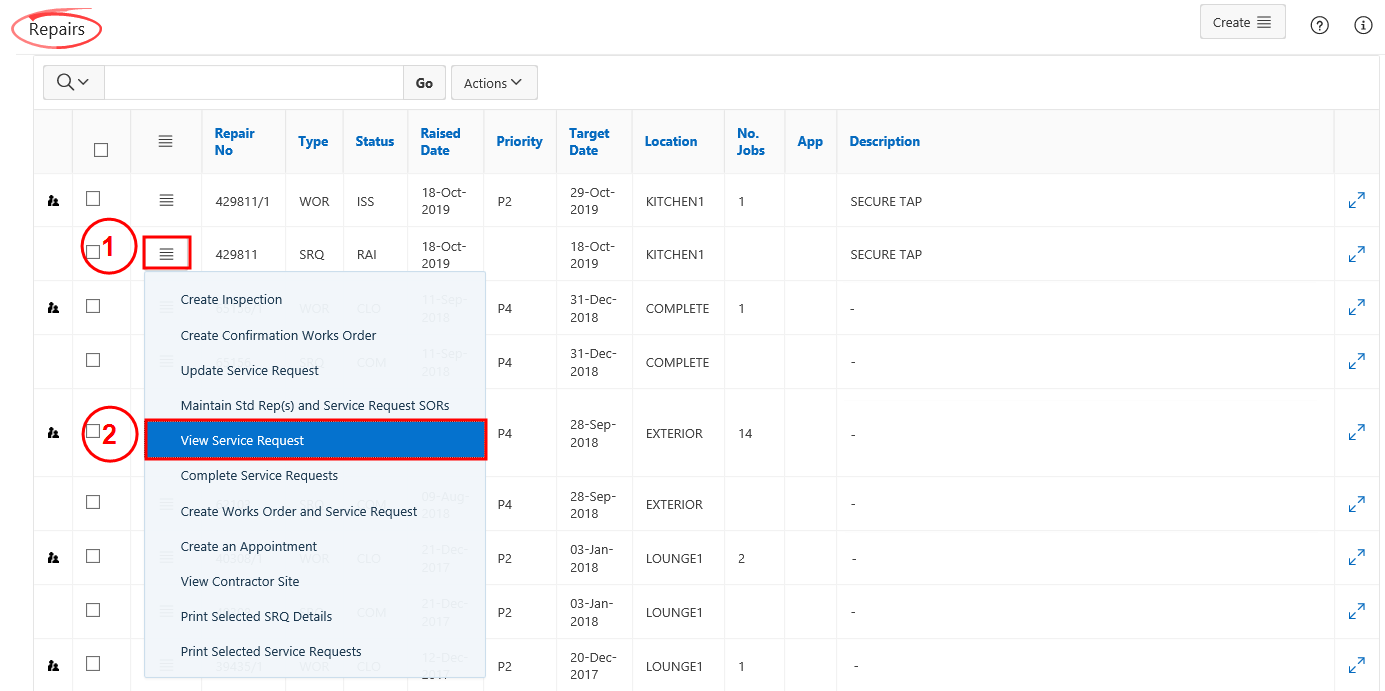
From the Works Orders region, select Create and then Create Works Order and Service Request.

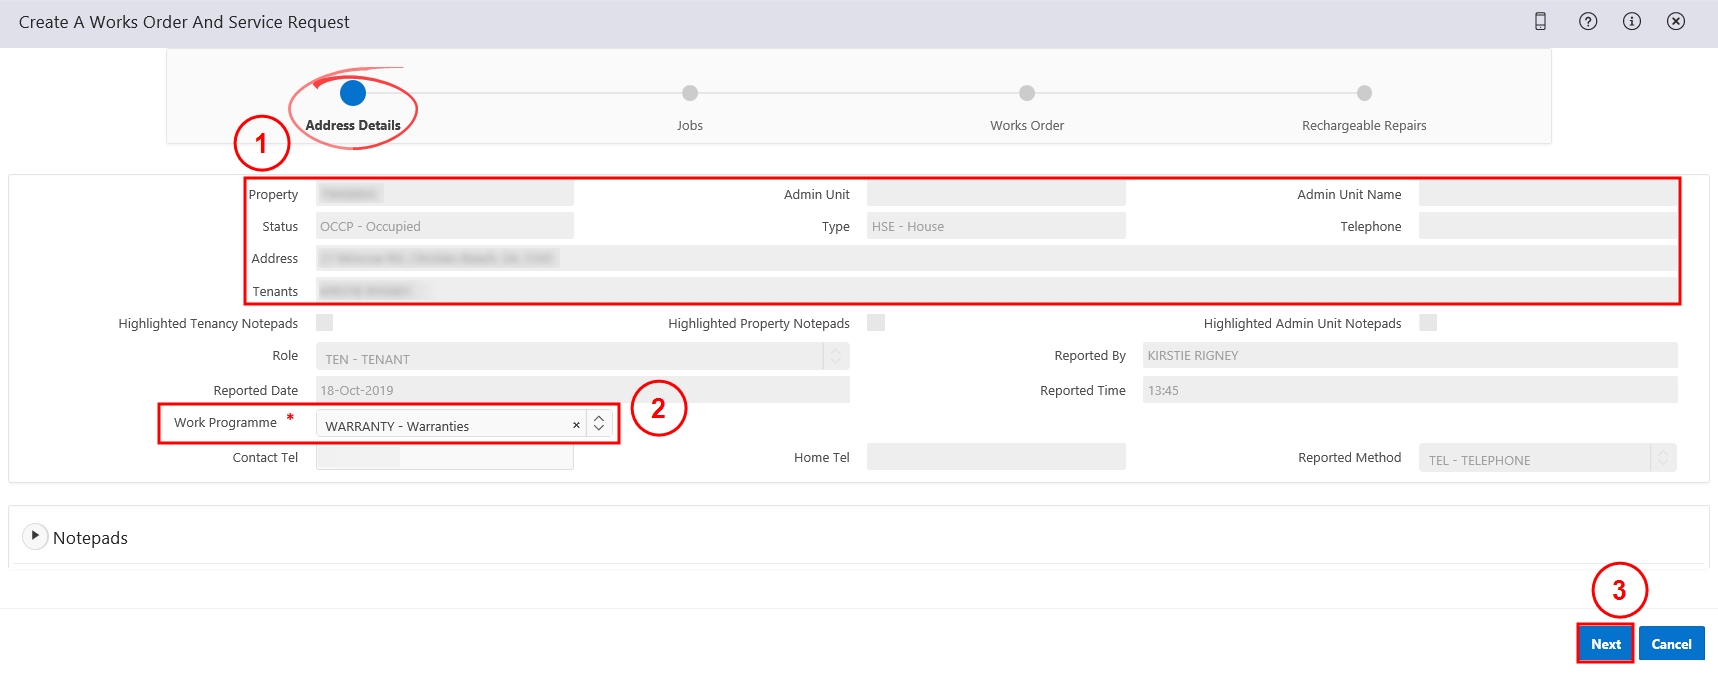
The Create Works Order and Service Request wizard will open. On the Address Details step, review the address and tenancy details. Select WARRANTY - Warranties from the Work Programme drop-down. Select Next.
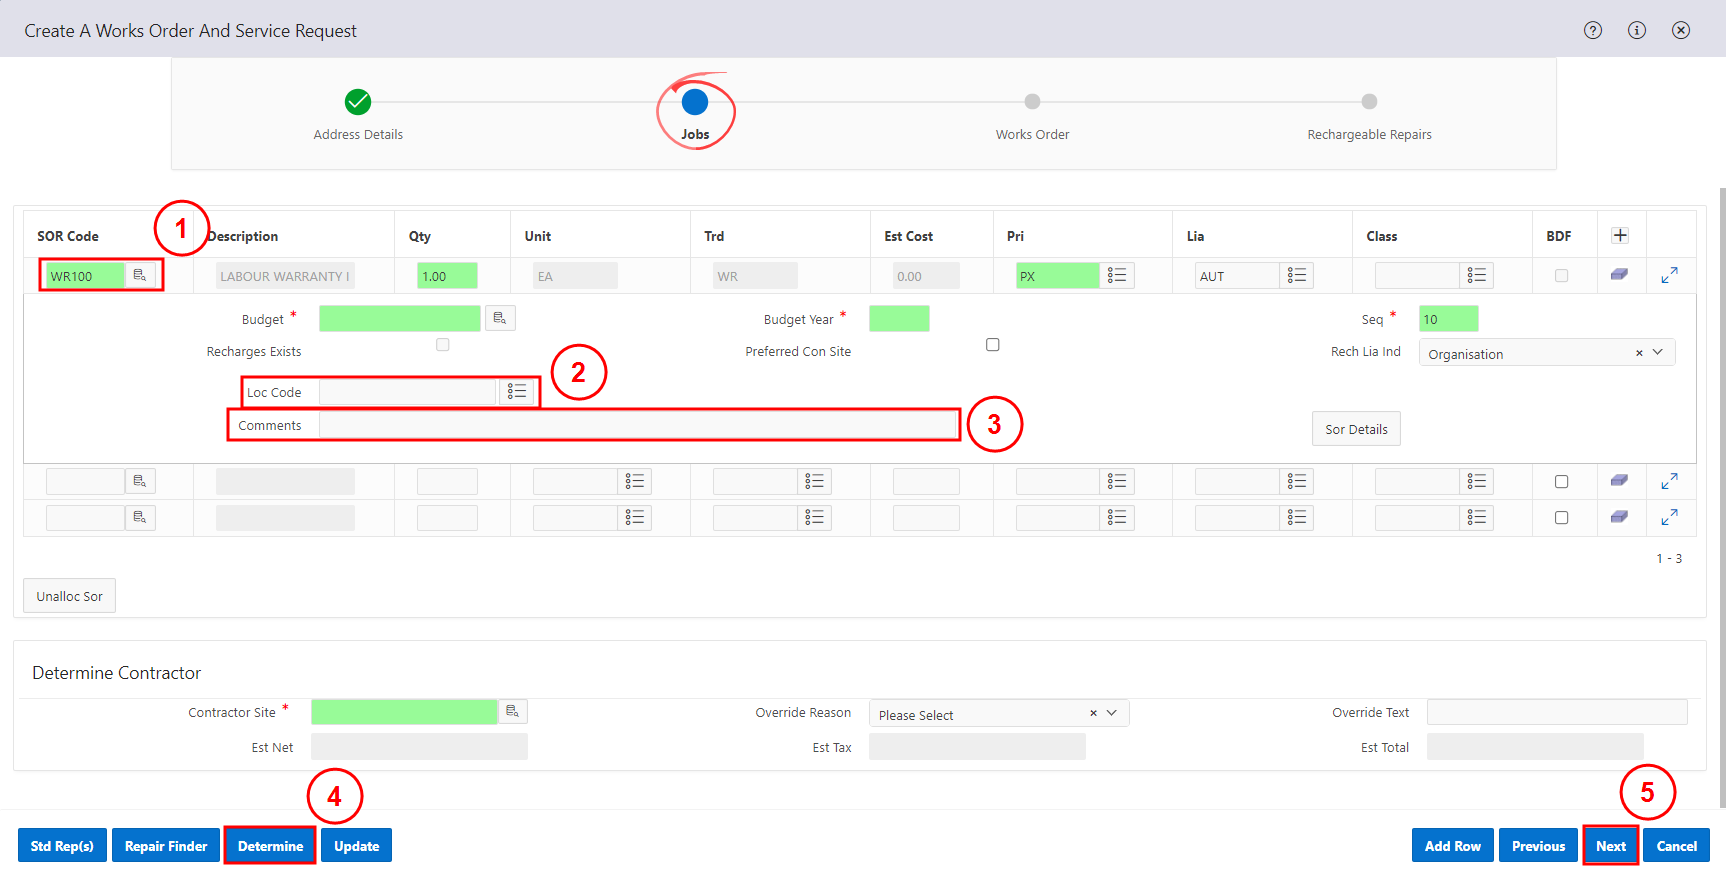
On the Jobs step, enter WR100 in the SOR Code field. Select the location of the original works from the Loc Code drop-down. Enter the details of the original works in the Comments field. Select Determine to populate the remaining mandatory fields. Then select Next.
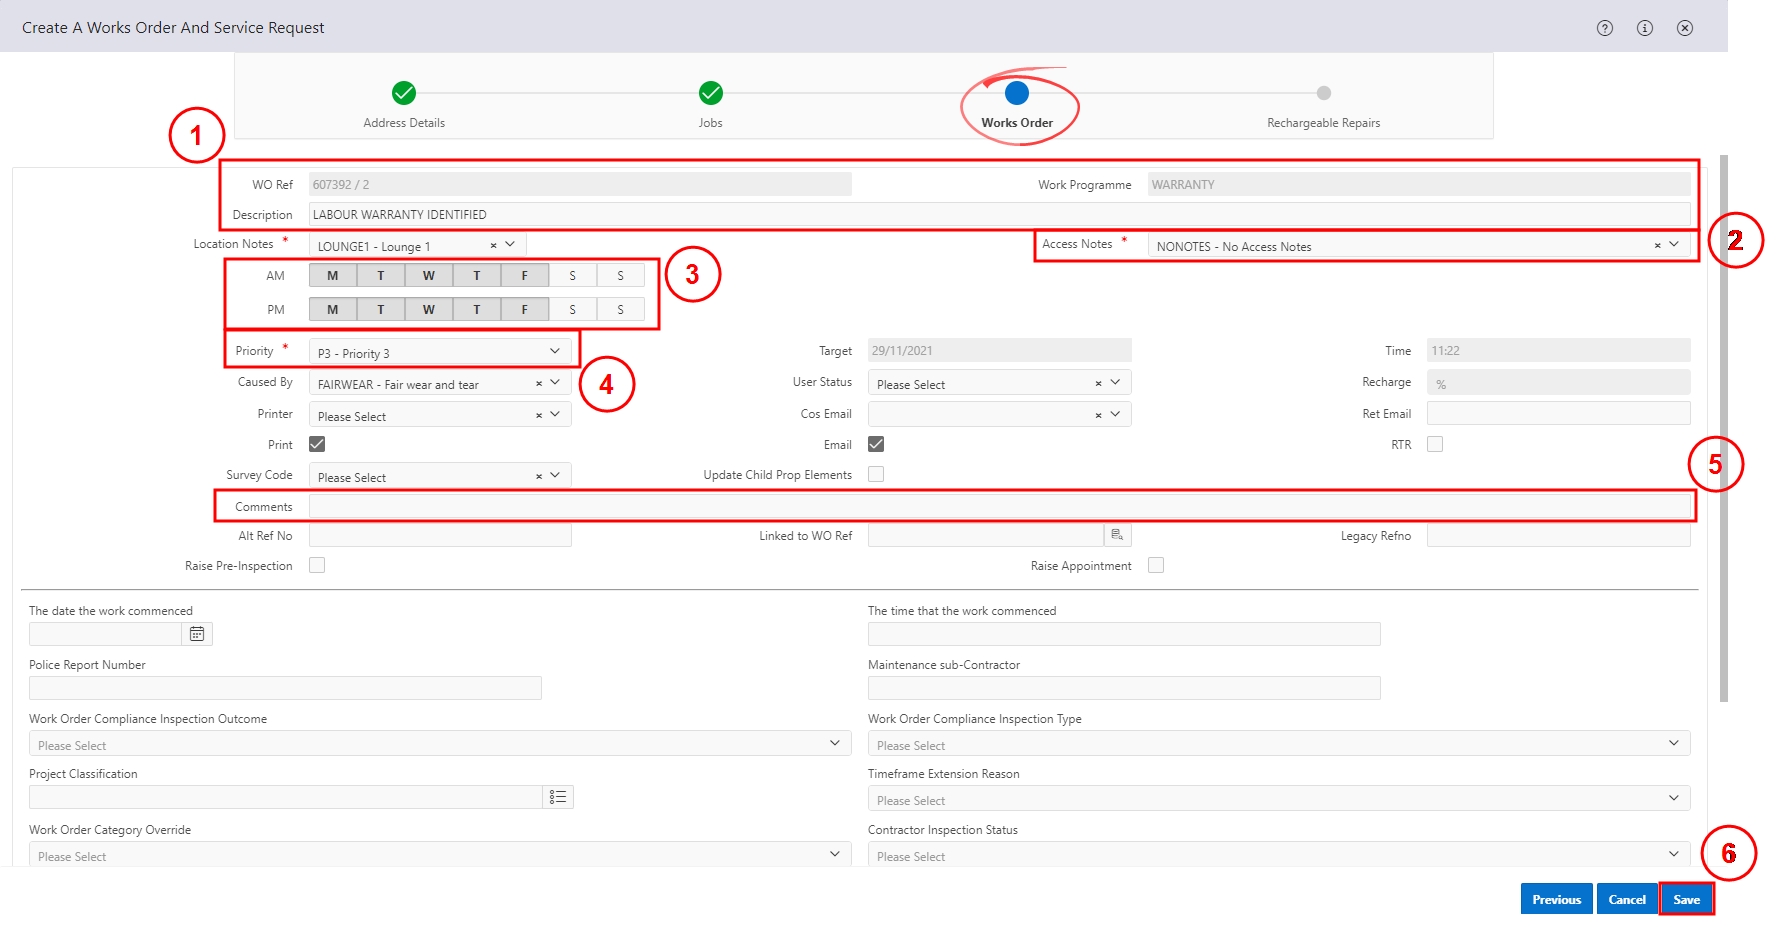
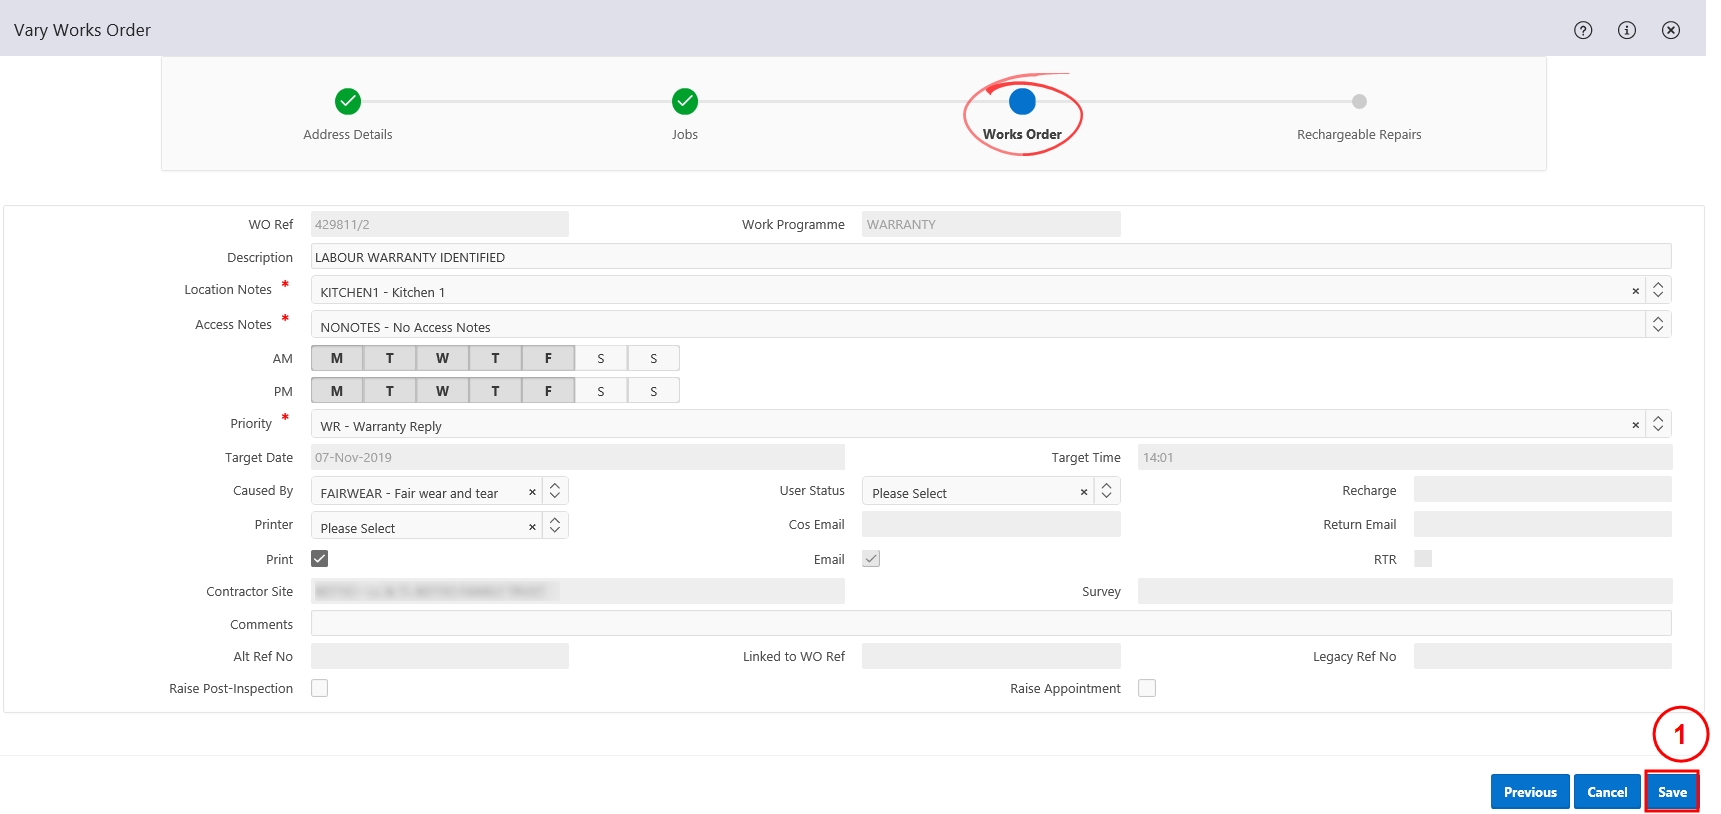
On the Works Order step review the information and:
- from the Access Notes drop-down, select the relevant option
- unselect any AM/PM boxes when the tenant is not available
- from the Priority drop-down, select the same priority as the original order, except for priority 0.
- in the Comments field, enter the original works order reference number.
Select Save.
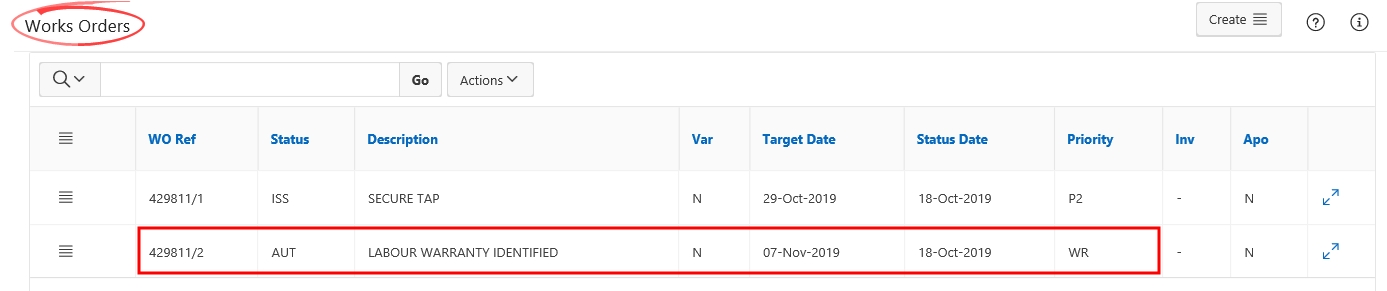
The Labour Warranty Identified works order will be created within the service request and displayed in the Works Order region.
Only complete the relevant steps below.
Retrieve the Works Order - Warranty Response task ( Task Manager - View a Task), OR
Search for the relevant Works Order ( Search and View a Works Order).
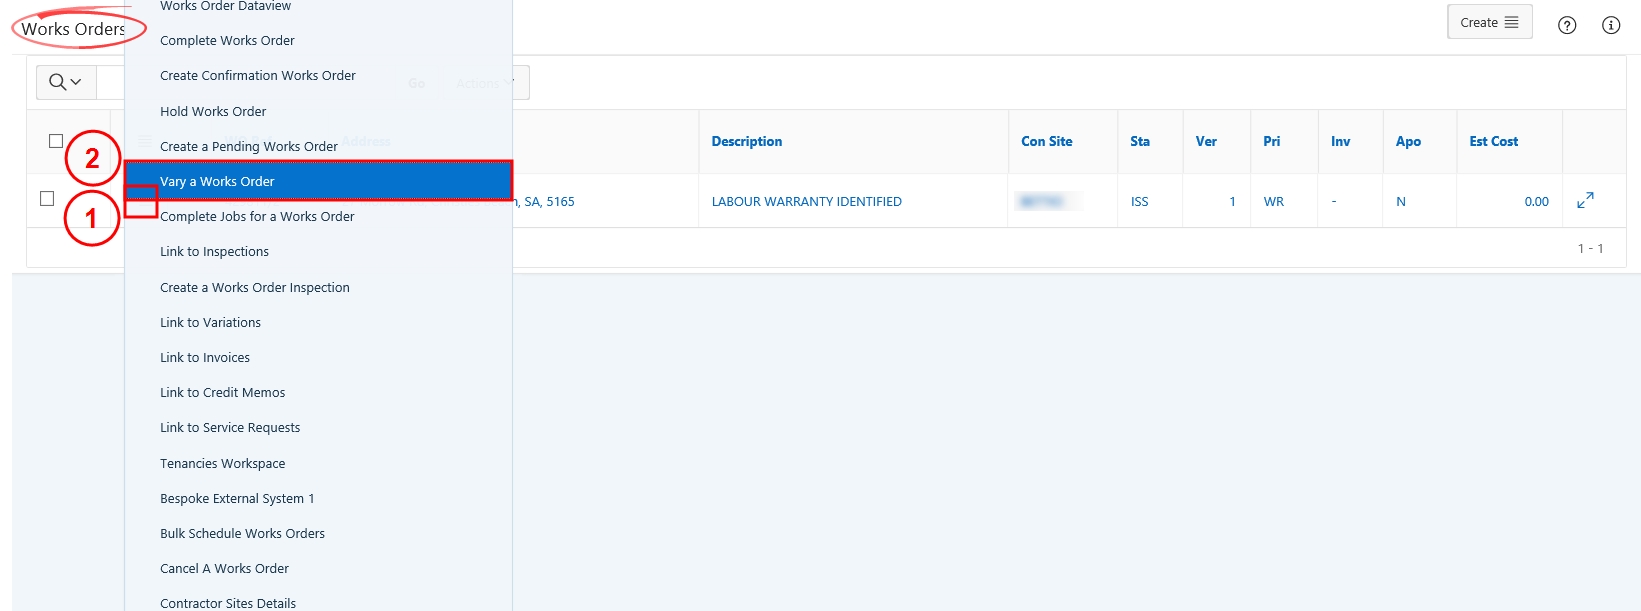
Select the Row Action Icon for the relevant Works Order and select Vary a Works Order.
On the Address Details step, select WARRESP from the Variation Request drop-down. Select Next.
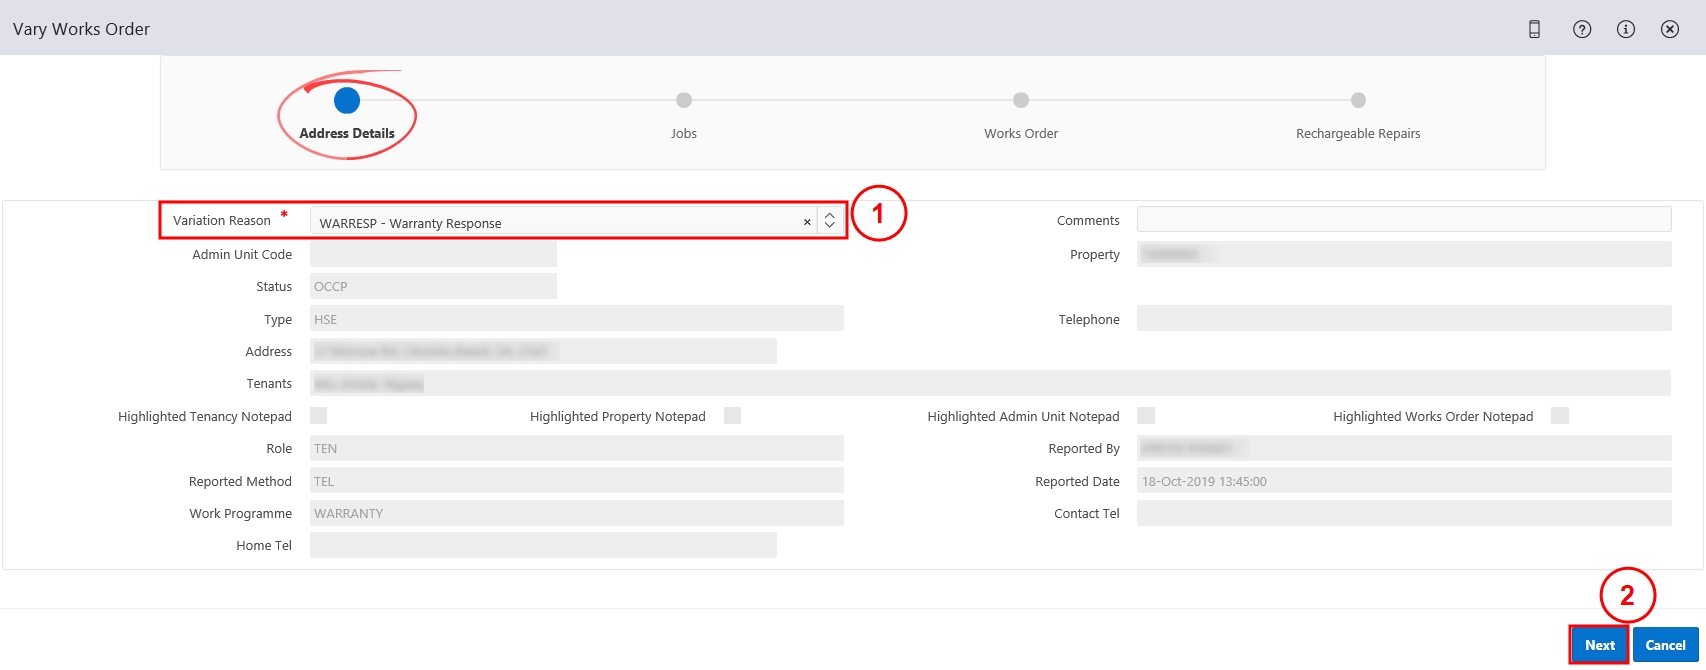
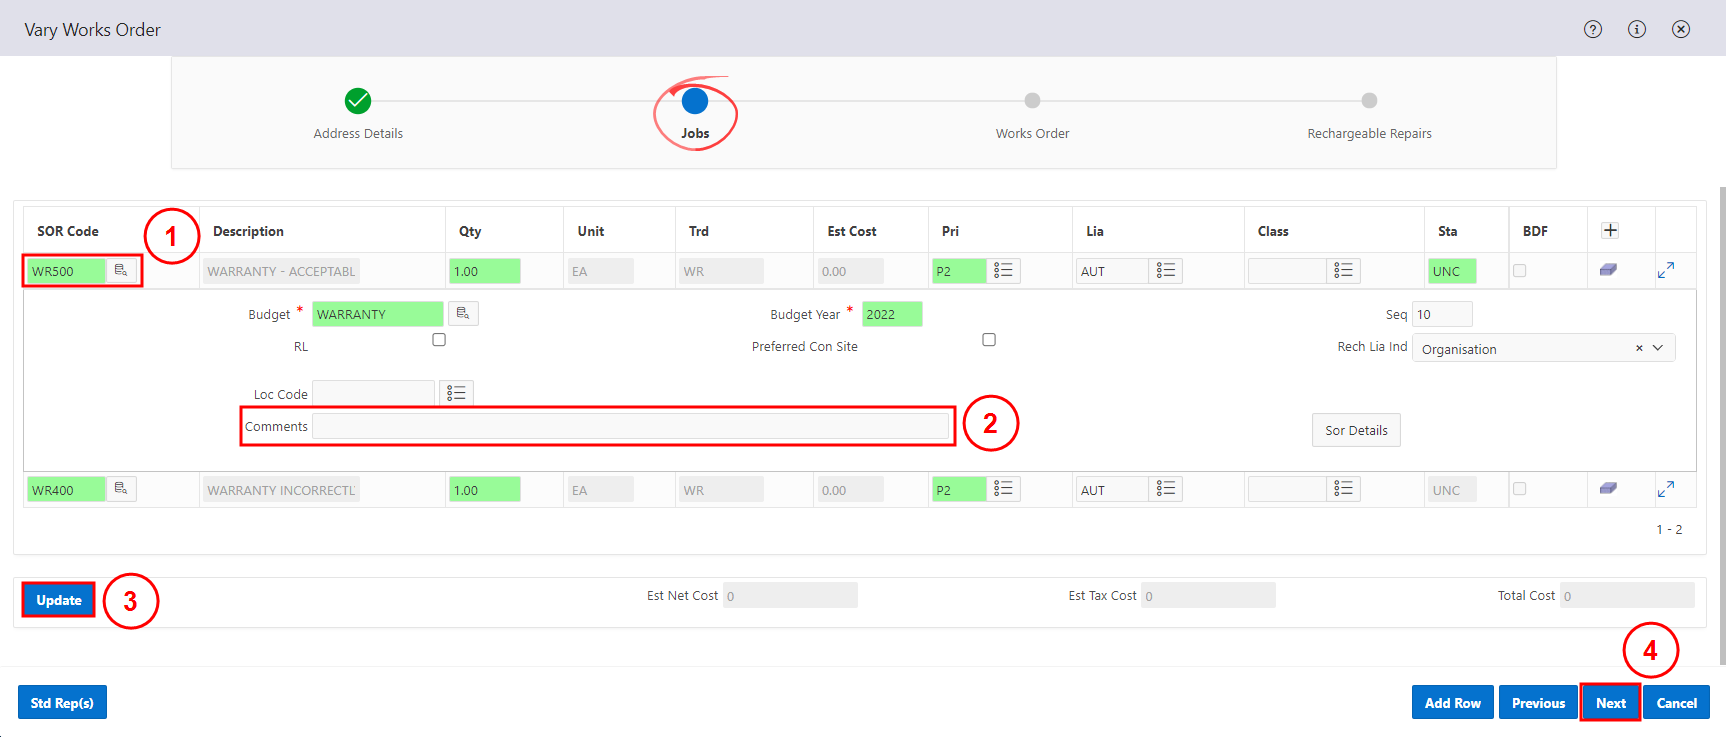
On the Jobs step, enter WR500 in the SOR Code field. Enter the reason why the response is being accepted in the Comments field and select Next.
On the Works Order step, select Save.
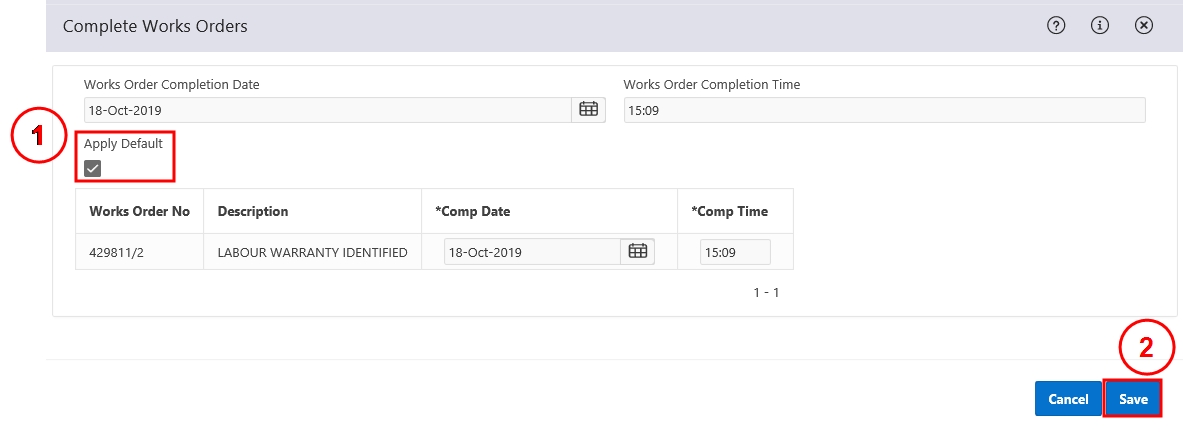
From the Works Orders region, select the Row Action Icon for the Works Order and select .

On the window, tick the box and select Save.
Retrieve the Works Order - Warranty Response task ( Task Manager - View a Task), OR
Search for the relevant Works Order ( Search and View a Works Order).
Select the Row Action Icon for the relevant Works Order and select Vary a Works Order.
On the Address Details step, select WARRESP from the Variation Request drop-down. Select Next.
On the Jobs step, enter WR600 in the SOR Code field. Enter the reason why the response is being rejected in the Comments field and select Next.
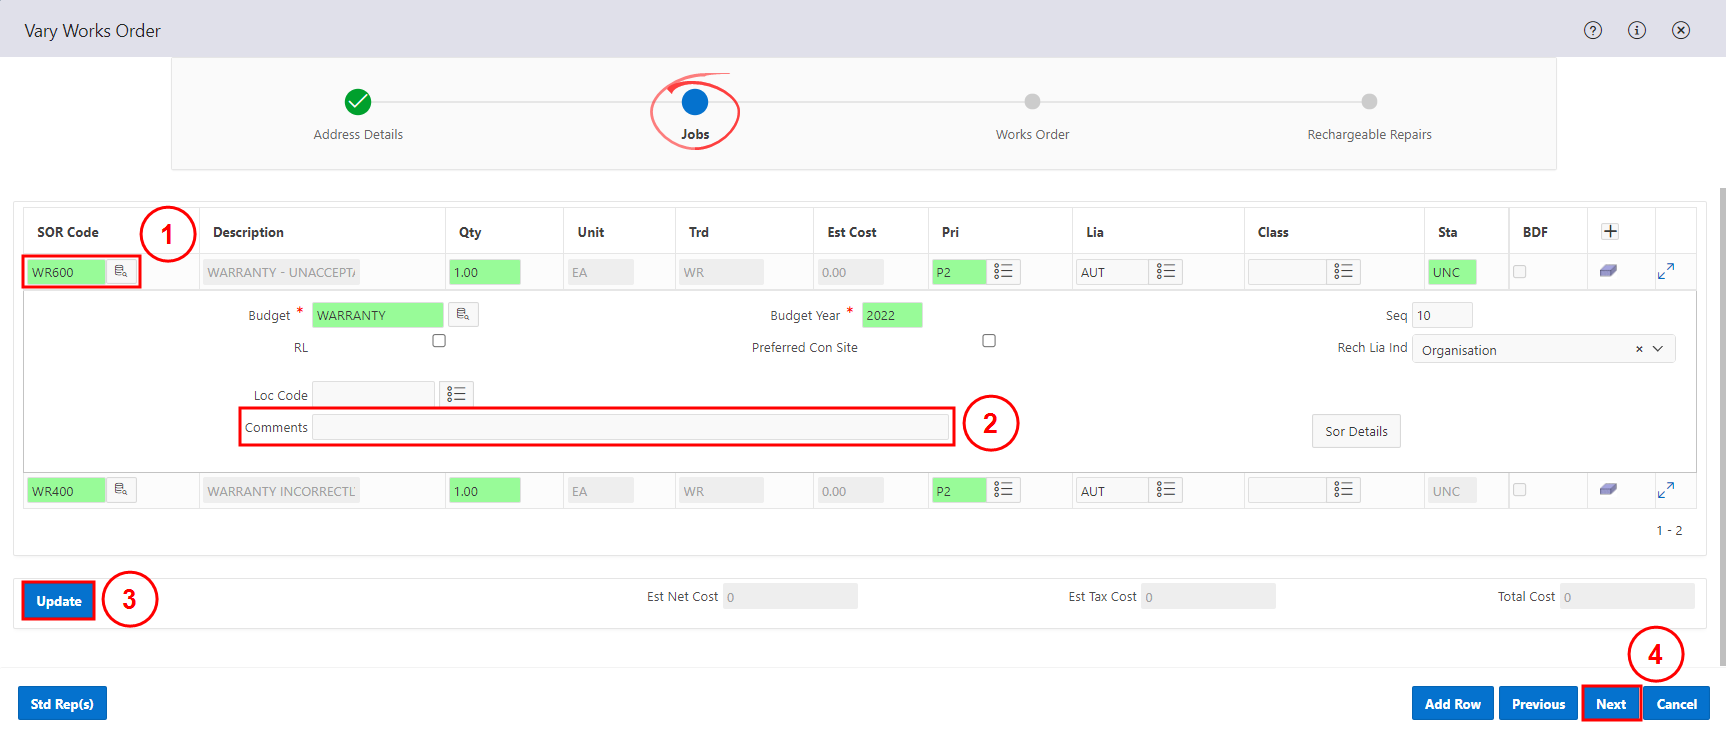
On the Works Order step, select Save.
From the Works Orders region, select the Row Action Icon for the Works Order and select .
On the window, tick the box and select Save.
Retrieve the Works Order - Warranty Response task ( Task Manager - View a Task), OR
Search for the relevant Works Order ( Search and View a Works Order).
Select the Row Action Icon for the relevant Works Order and select Vary a Works Order.
On the Address Details step, select WARRESP from the Variation Request drop-down. Select Next.
On the Jobs step, enter WR300 in the SOR Code field. Enter the reason why the response is being accepted in the Comments field and select Next.
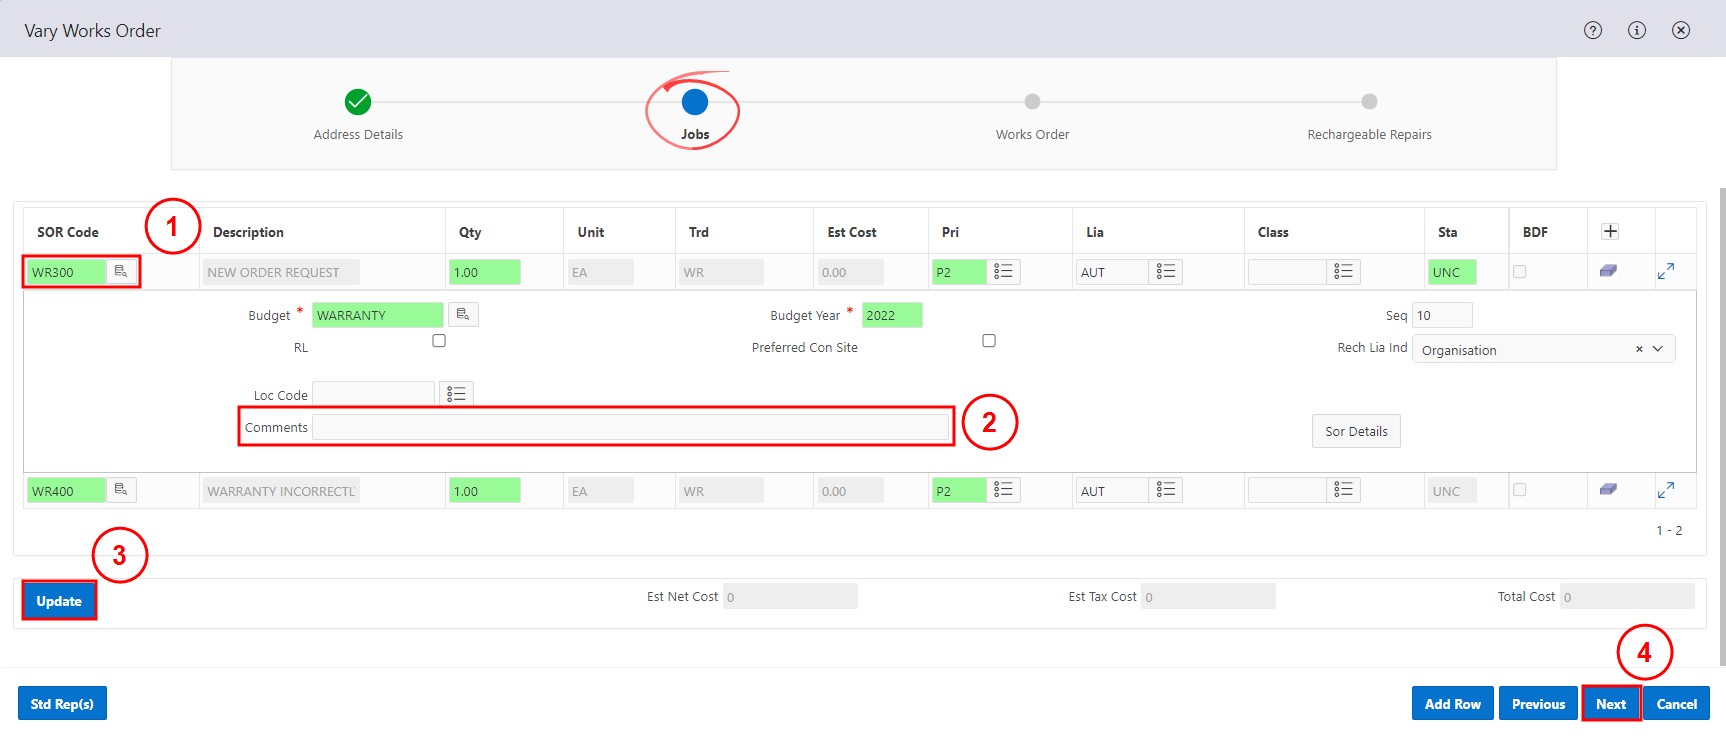
On the Works Order step, select Save.
From the Works Orders region, select the Row Action Icon for the Works Order and select .
On the window, tick the box and select Save.
Only complete the relevant steps below.
Retrieve the Works Order - Warranty Response task ( Task Manager - View a Task), OR
Search for the relevant Works Order ( Search and View a Works Order).
Select the Row Action Icon for the relevant Works Order and select Vary a Works Order.
On the Address Details step, select WARRESP from the Variation Request drop-down. Select Next.
On the Jobs step, enter WR500 in the SOR Code field. Enter the reason why the response is being accepted in the Comments field and select Next.
On the Works Order step, select Save.
From the Works Orders region, select the Row Action Icon for the Works Order and select .
On the window, tick the box and select Save.
Search and view the property details ( Search and View Property or Complex Details).
On the Property Profile screen, select Repairs from the top navigation links.
From the Repairs region, select the Row Action Icon for the relevant Service Request and select View Service Request.
From the Works Orders region, select Create and then Create Works Order and Service Request.
The Create Works Order and Service Request wizard will open. On the Address Details step, review the address and tenancy details. Select WARRANTY - Warranties from the Work Programme drop-down. Select Next.
On the Jobs step, enter WR100 in the SOR Code field. Select the location of the original works from the Loc Code drop-down. Enter the details of the original works in the Comments field. Select Determine to populate the remaining mandatory fields. Then select Next.
On the Works Order step review the information and:
- from the Access Notes drop-down, select the relevant option
- unselect any AM/PM boxes when the tenant is not available
- from the Priority drop-down, select the same priority as the original order, except for priority 0.
- in the Comments field, enter the original works order reference number.
Select Save.
The Labour Warranty Identified works order will be created within the service request and displayed in the Works Order region.
Retrieve the Works Order - Warranty Response task ( Task Manager - View a Task), OR
Search for the relevant Works Order ( Search and View a Works Order).
Select the Row Action Icon for the relevant Works Order and select Vary a Works Order.
On the Address Details step, select WARRESP from the Variation Request drop-down. Select Next.
On the Jobs step, enter WR600 in the SOR Code field. Enter the reason why the response is being rejected in the Comments field and select Next.
On the Works Order step, select Save.
From the Works Orders region, select the Row Action Icon for the Works Order and select .
On the window, tick the box and select Save.